
WordPress
参考网址:https://cloud.tencent.com/document/product/213/8044
环境为Ubuntu20.04
LNMP 环境搭建
1、Nginx安装
sudo apt install nginx
#开机自启动
sudo systemctl enable nginx
或者使用官方的源:http://nginx.org/en/linux_packages.html#Ubuntu
查看状态
systemctl status nginx
配置防火墙
#开启80端口和443端口
sudo ufw allow 'Nginx Full'
#查看端口开启状态
sudo ufw status
- 所有的 Nginx 配置文件都在
/etc/nginx/目录下。 - 主要的 Nginx 配置文件是
/etc/nginx/nginx.conf。 - 为每个域名创建一个独立的配置文件,便于维护服务器。你可以按照需要定义任意多的 block 文件。
Nginx 服务器配置文件被储存在/etc/nginx/sites-available目录下。在/etc/nginx/sites-enabled目录下的配置文件都将被 Nginx 使用。- 推荐使用 conf.d ,方便,如果不使用,直接换个名称就行了
修改配置文件
简单测试发现403,一种原因就是启动方和nginx工作用户不一致
ps aux | grep "nginx: worker process" | awk '{print $1}'
vi nginx.conf
#把user后面的变成当前用户
user root
启动、停止和重新加载配置
nginx -s 信号

#信号为下面这四种
stop — 快速关机
quit — 优雅关机
reload — 重新加载配置文件
reopen — 重新打开日志文件
设置配置
以下的为/etc/nginx/conf.d/szx.life.conf文件的配置。
upstream php {
        server unix:/run/php/php8.0-fpm.sock;
        #server 127.0.0.1:9000;
}

server {

        ## Your website name goes here.
        server_name szx.life;
        ## Your only path reference.
        root /usr/share/nginx/html/wordpress;
        ## This should be in your http block and if it is, it's not needed here.
        index index.php;

        # open SSL
        listen 443 ssl http2;
        #Certificate file name
        ssl_certificate 1_szx.life_bundle.crt;
        #Private key file name
        ssl_certificate_key 2_szx.life.key;
        ssl_session_timeout 5m;
        ssl_protocols TLSv1 TLSv1.1 TLSv1.2 TLSv1.3;
        ssl_ciphers ECDHE-RSA-AES128-GCM-SHA256:HIGH:!aNULL:!MD5:!RC4:!DHE;
        ssl_prefer_server_ciphers on;
        add_header Strict-Transport-Security "max-age=63072000; includeSubdomains; preload";

        client_max_body_size 50m;

        fastcgi_buffers 256 4k;

        location = /favicon.ico {
                log_not_found off;
                access_log off;
        }

        location = /robots.txt {
                allow all;
                log_not_found off;
                access_log off;
        }


        location / {
                # This is cool because no php is touched for static content.
                # include the "?$args" part so non-default permalinks doesn't break when using query string
                try_files $uri $uri/ /index.php?$args;
        }

        location ~ \.php$ {
                #NOTE: You should have "cgi.fix_pathinfo = 0;" in php.ini
                include fastcgi.conf;
                fastcgi_intercept_errors on;
                fastcgi_pass php;
        }

        location ~* \.(js|css|png|jpg|jpeg|gif|ico|webp)$ {
                expires max;
                log_not_found off;
        }
}
server {
                listen 80;
                #填写绑定证书的域名
                server_name szx.life,www.szx.life;
                #把http的域名请求转成https
                return 301 https://$host$request_uri;
}
2、mariadb数据库安装
版本10.5,这个用户身份认证已经和之前的不一样了,不要参考老版本的解决方案。
所有用户帐户,密码和全局特权都存储在mysql.global_priv表中。
参考官网:https://mariadb.org/download/
安装
#添加清华源秘钥
sudo apt-get install software-properties-common dirmngr apt-transport-https -y
sudo apt-key adv --fetch-keys 'https://mariadb.org/mariadb_release_signing_key.asc'
sudo add-apt-repository 'deb [arch=amd64,arm64,ppc64el] https://mirrors.tuna.tsinghua.edu.cn/mariadb/repo/10.5/ubuntu focal main'

#更新源并且安装
sudo apt update
sudo apt install mariadb-server -y
sudo apt install mariadb-client -y

#开启服务
sudo systemctl start mariadb
#开机自启动
sudo systemctl enable mariadb
通过sudo mysql能够进去,因为可以通过unix_socket认证,但mysql进不去,因此需要授权登录。
更改root密码
#进入数据库
sudo mysql
#显示所有数据库
show databases;
#使用mysql这个数据库
use mysql;
#更新密码,因为版本10.4+已经变了方式了,所以还得看官方文档
#https://mariadb.com/kb/en/set-password/
SET PASSWORD FOR 'root'@'localhost' = PASSWORD('TehQ5BDN');
创建新的用户
#创建新的用户,登录可以使用密码或者不用密码,通过unix_socket认证,反正就是不用密码https://mariadb.com/kb/en/create-user/
CREATE USER 'ubuntu'@'localhost' IDENTIFIED VIA mysql_native_password USING PASSWORD('pGQwBmwf') OR unix_socket;
#给ubuntu所有的权限
GRANT ALL ON *.* TO 'ubuntu'@'localhost';
#或者给予部分权限
#GRANT ALL PRIVILEGES ON wordpress.* TO 'user'@'localhost' IDENTIFIED BY '123456';
#查看是不是更改和创建成功了
select * from global_priv;
#退出
exit;
这样子以后都可以直接通过输入mysql直接登录,也不用密码;
或者 mysql -u root -p
查看日志
在/etc/mysql/mariadb.conf.d/50-server.cnf
general是每一条的sql语句日志,如果没有特殊问题的话,不建议开启,毕竟文章会膨胀
log_error可以开起来,看看错误日志。
slow_query是慢查询,超过10s的就会有记录。
general_log_file       = /var/log/mysql/mysql.log
general_log            = 1

log_error = /var/log/mysql/error.log

slow_query_log_file    = /var/log/mysql/mariadb-slow.log
重启数据库
sudo service mysql restart
3、php配置
安装
#启用PHP存储库
sudo apt install software-properties-common
sudo add-apt-repository ppa:ondrej/php
#使用 Nginx 安装 PHP 8.0
sudo apt update
sudo apt install php8.0-fpm -y
#查看是否安装成功
systemctl status php8.0-fpm
#重启php服务
sudo service php8.0-fpm restart
把用户改为自己当前的用户
在/etc/php/8.0/fpm/pool.d/www.conf
user = ubuntu
group = ubuntu
插件安装
其他插件安装,后续会用到,所以安装起来。
wordpress在设置-》站点健康,可以看到有哪些应用还需要装,可以通过那个检查一下。
#php8.0-gd裁剪照片的时候会用到
#php8.0-mysql 连接数据库,算是必备的
#php8.0-xml php8.0-ssh2 SSH2连接需要用到
#php8.0-xmlrpc 应该是push-markdown需要用到的
sudo apt install php8.0-mysql php8.0-xml php8.0-ssh2 php8.0-gd php8.0-xmlrpc php8.0-http php8.0-curl php8.0-mbstring php8.0-imagick php8.0-zip php8.0-bcmath php8.0-memcached php8.0-gmp -y
WordPress搭建
1、创建数据库
#登录mysql
CREATE DATABASE wordpress;
2、下载WordPress
#这个为nginx的默认地址
cd /usr/share/nginx/html
#下载
sudo wget https://cn.wordpress.org/latest-zh_CN.tar.gz
#解压
sudo tar zxvf wordpress-5.7.2-zh_CN.tar.gz
3、修改配置
cd /usr/share/nginx/html/wordpress
#备份
sudo cp wp-config-sample.php wp-config.php
#修改文件
sudo vim wp-config.php
找到Mysql的部分,然后修改
// ** MySQL settings - You can get this info from your web host ** //
 /** The name of the database for WordPress */
 define('DB_NAME', 'wordpress');

 /** MySQL database username */
 define('DB_USER', 'user');

 /** MySQL database password */
 define('DB_PASSWORD', '123456');

 /** MySQL hostname */
 define('DB_HOST', 'localhost');
4、进入WordPres
在浏览器里输入ip和地址
http://192.xxx.xxx.xx/wordpress
就可以按照操作进行设置了。
5、修改权限
将当前文件的用户所有权给当前的用户(我的是ubuntu)
sudo chown -R ubuntu:ubuntu wordpress
sudo chmod -R 755 wp-content
插件安装
SSH SFTP Updater Support
这个插件可以使得上传方式通过SSH2,可以使用私钥连接进行上传文件操作,或者能直接在线安装插件了。
下载地址:https://wordpress.org/plugins/ssh-sftp-updater-support/
下载完成后,将压缩包解压得到的文件上传至服务器…/wp-content/plugins/ssh-sftp-updater-support/目录下。
进入wordpress控制台,启用该插件,并且在 wp-config.php中加入这条语句:
define('FS_METHOD', 'ssh2');
注意:这里需要PHP安装相应的插件,php8.0-ssh2和php8.0-xml
WEN Featured Image
这个插件能够在文章界面编辑文章头图,不用进入到文章编辑里面,方便快捷,推荐。
WordPress配置
开启日志错误输出
在 wp-config.php中加入下面的语句
define( 'WP_DEBUG', true );
define( 'WP_DEBUG_LOG', true );
define( 'WP_DEBUG_DISPLAY', true );
@ini_set( 'display_errors', 0 );
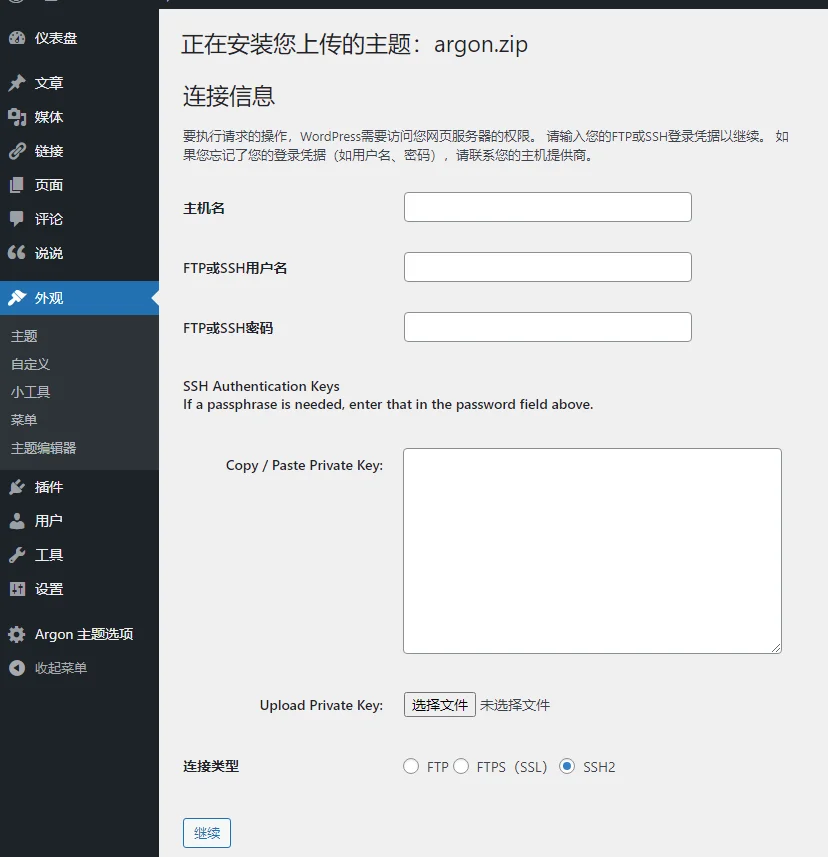
上传主题
上传主题压缩包,这里我用argon的主题包。https://github.com/solstice23/argon-theme
下载就可以在页面上进行上传主题,并且安装,但这里会有点问题,一个是写入权限、上传大小限制,还有就是通过ssh进行上传,如下图所示。
然后根据argon的主题配置文档走一下,https://argon-docs.solstice23.top。
用户头像
去Gravatar自动关联邮箱,并且在argon的主题选项里的Gravatar CDN添加国内加速网址。
网站图标
在外观-自定义-站点身份进行设置,图像必须至少为512*512像素。
注意:这里需要PHP安装相应的插件,php8.0-gd
其他优化
推送Markdown到WordPress
介绍地址:https://zhuanlan.zhihu.com/p/105236218
源码地址:https://github.com/jzj1993/PublishMarkdown/
问题
解决写入权限错误
需要统一三个地方的文件权限
首先是php的user,然后是nginx的user,再一个是wordpress的文件权限,前两个前文已经修改过了。
没有wp-content的权限问题,需要加上写入权限。
解决上传大小限制
413 Request Entity Too Large错误
参考网址:https://blog.csdn.net/qq_45837591/article/details/106385814
在/etc/php/8.0/fpm/php.ini中,把2M的限制改成50M.
upload_max_filesize = 50M --使PHP接收用户上传的更大的数据
记得重启一下php。
解决post发送文件大小限制
在/etc/php/8.0/fpm/php.ini中,把8M的限制改成50M.
post_max_size = 50M;
记得重启一遍php。
修改php进程数
在/etc/php/8.0/fpm/pool.d/www.conf
pm.max_children = 50
后台样式没有加载
因为css样式太大了,加载不成功。
在nginx的server里面加入这句
fastcgi_buffers 256 4k;
一些链接
更改WordPress网站URL四种方法:https://www.wordpress.la/change-wordpress-url.html


味道非常好,五星支持,下次还会回购